 Openlayers实现方位角测量
# 概述
在前面《Openlayers 实现角度测量》 (opens new window)中提到了角度的测量,本文会介绍如何实现在 Openlayers 中进行方位角测量.
# 方位角
在 OpenLayers 中,方位角(Azimuth) 通常指的是某一点的方向相对于北方的角度。它是描述从某个位置出发的线与北方之间的角度关系,通常以度为单位,范围从 0° 到 360°。方位角通常在地图上用于指示某个方向、航向或目标的位置,特别是在涉及导航、路径规划、或定位应用时非常常见。
方位角的概念:
- 北方(0°): 通常,方位角的起点为北方。也就是说,方位角为 0° 表示指向正北方。
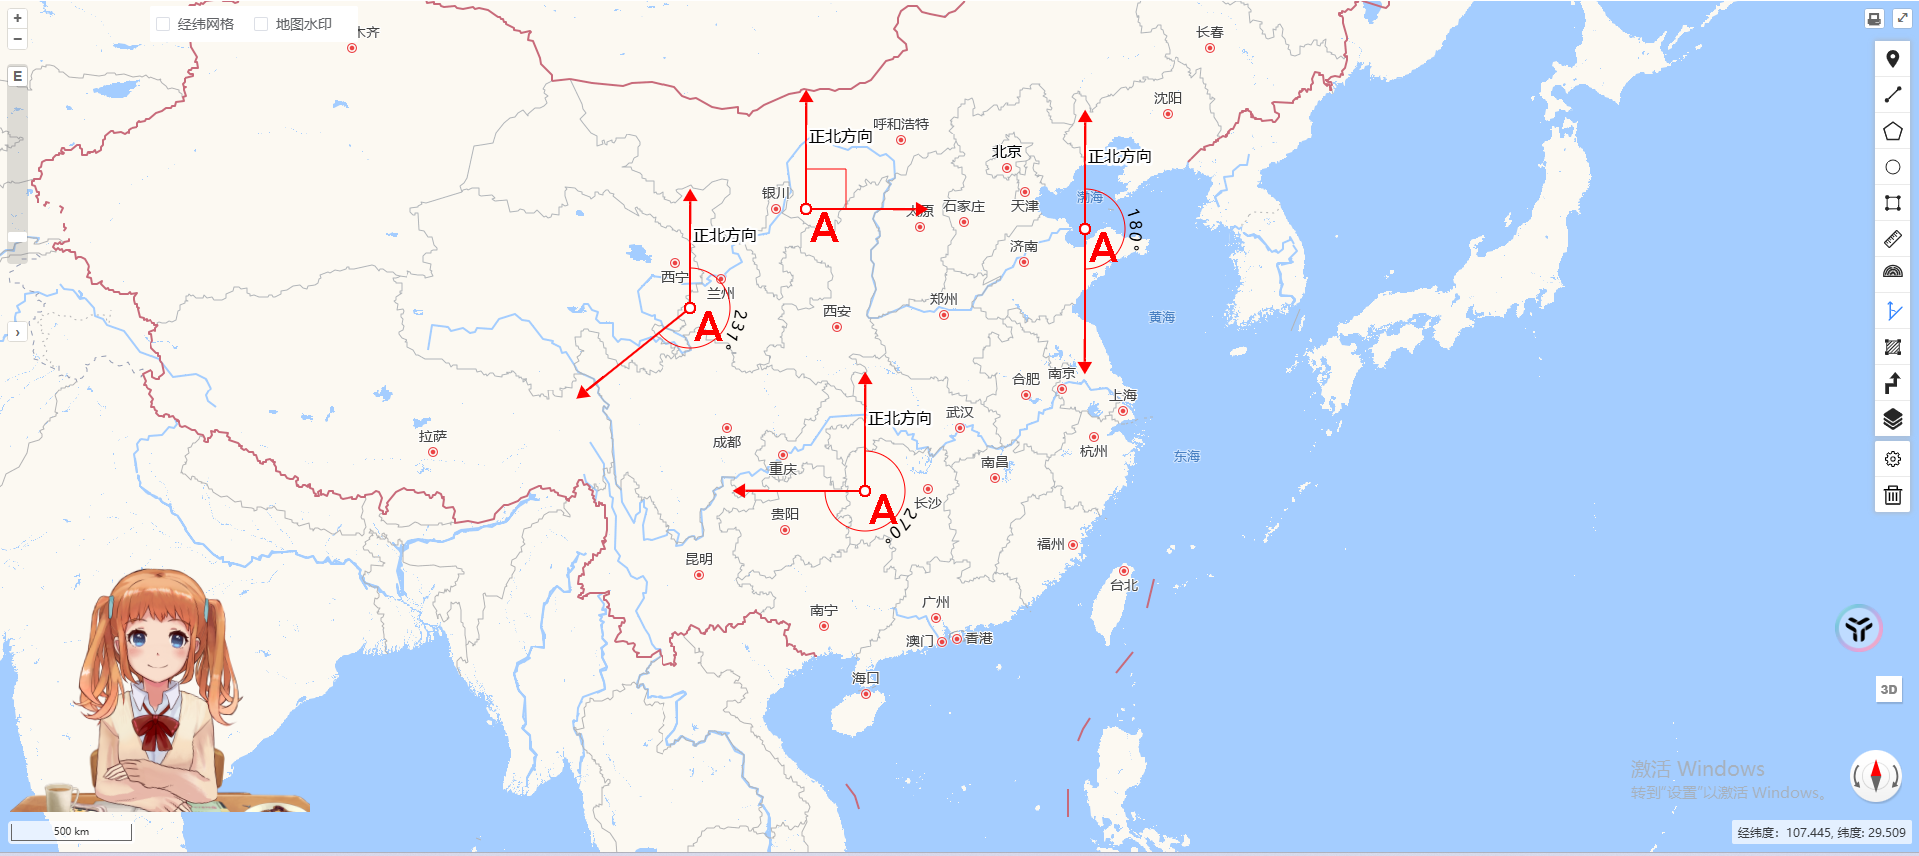
- 顺时针方向: 方位角是以顺时针方向计算的,因此 90° 是正东方向,180° 是正南方,270° 是正西方。
- 角度范围: 方位角的取值范围通常是 0° 到 360°,0° 和 360° 都指向正北方,90° 是东,180° 是南,270° 是西。
# 实践
# 效果展示
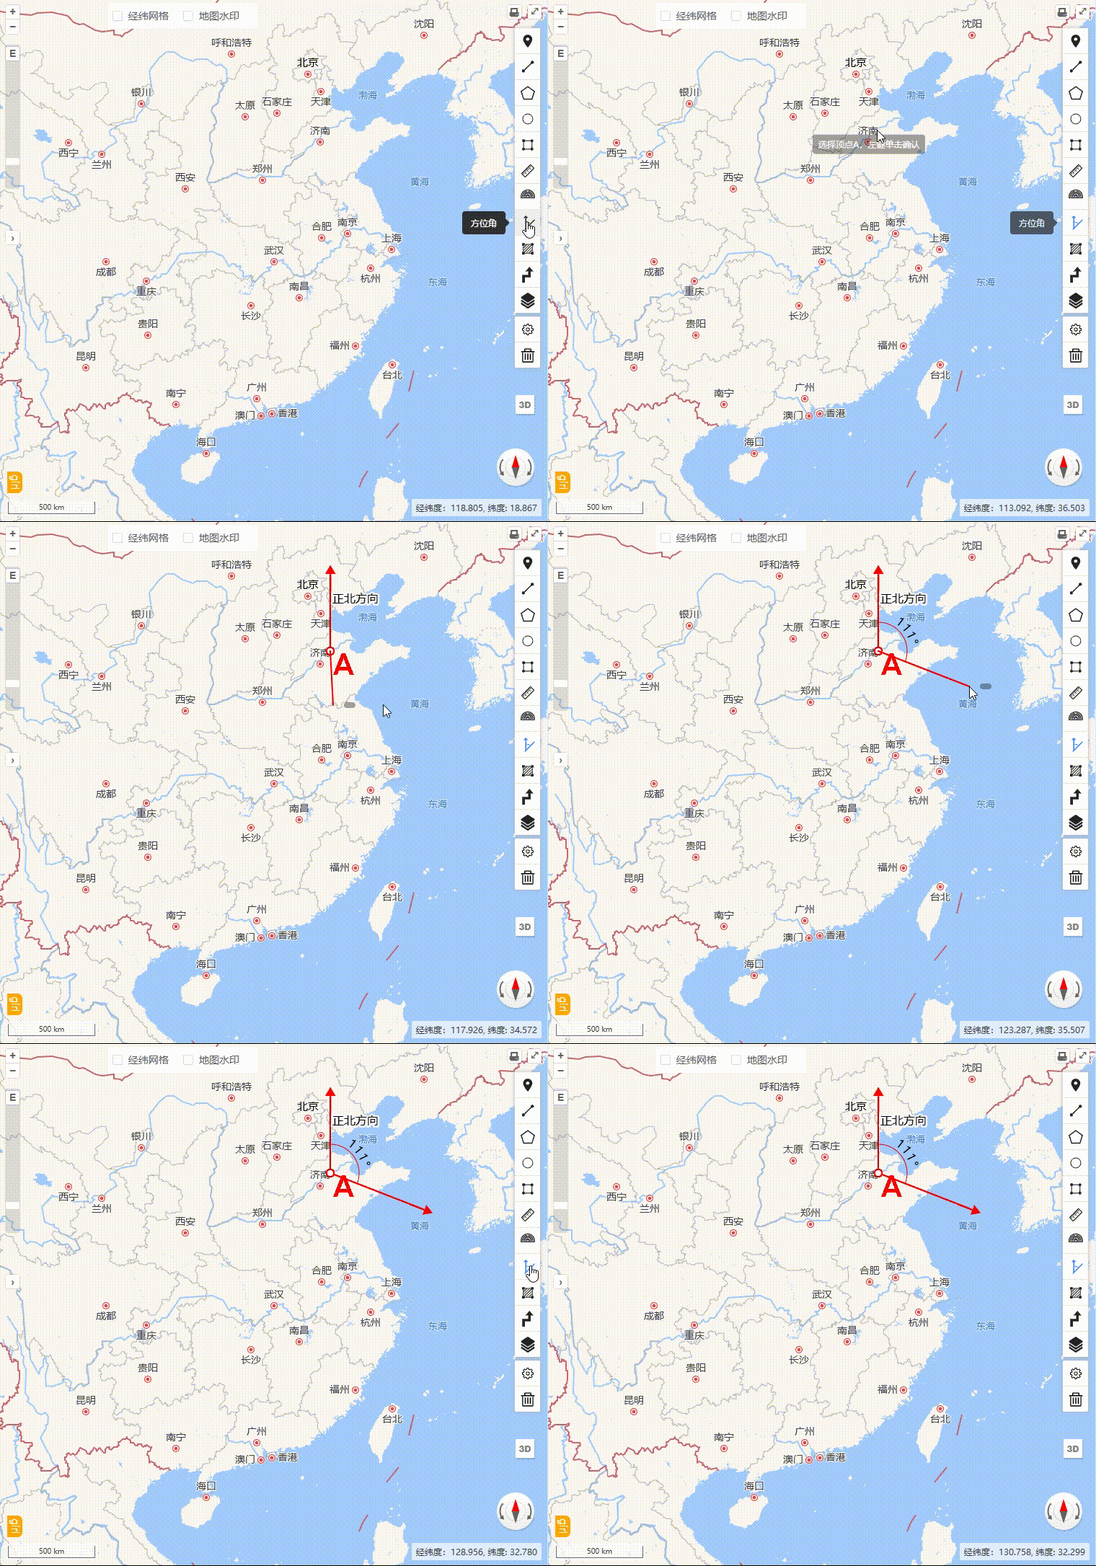
绘制

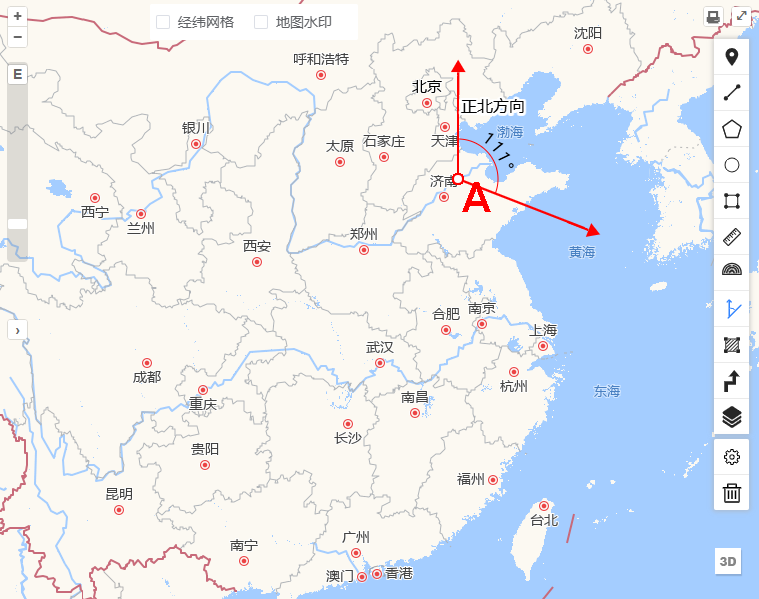
结果

# 具体实现
其实方位角测量的实现和角度的测量大同小异,不过角度的测量需要选定三个点,而方位角其中有一个线段始终是与地图的正北方向平行,因此测量方位角只需要选两个点.其步骤如下:
- 选起点指向正北方向
监听当前几何对象的change事件,获取第一个点作为起点,并将该点保存在全局变量this.Points变量中.
this.listenGeometryChange = feature.getGeometry().on("change", (evt) => {
  const geom = evt.target;

  let startPoint = geom.getFirstCoordinate();

  this.addMarker({ coordinate: startPoint, symbolId: "A", anchor: [0, 0] });
  this.formatPonit(startPoint);
  if (this.Points.length == 0) {
    this.Points[0] = startPoint;
    this.drawNorLine();
  }
});
2
3
4
5
6
7
8
9
10
11
12
绘制指向正北方向的线段,即函数drawNorLine的实现如下, 我们假定线段的另一端距离起点(A 点)上方500km,因为当前地图的参考坐标系为 Openlayers 默认的EPSG:3857,因此另一端之间在纬度上相加距离,经度保持不变即可.如果地图的参考坐标系为EPSG:4326,相同距离都为500km,则其纬度是在A 点的纬度上加5°差不多,获取该点后,将其放在this.Points的首部.
  drawNorLine() {
    const [lon, lat] = this.Points[0];
    const distance = 500000; //500km
    const norPoint = [lon, lat + distance];

    const lineFeature = new Feature({
      geometry: new LineString([this.Points[0], norPoint]),
    });

    this.Points.unshift(norPoint);
    const textStyle = new Style({
      text: new Text({
        text: "正北方向",
        font: "16px Arial",
        fill: new Fill({
          color: "#000",
        }),
        stroke: new Stroke({
          color: "#fff",
          width: 4,
        }),
        offsetX: 35,
        offsetY: -20,
        rotation: 0,
        rotateWithView: true,
      }),
    });

    lineFeature.setStyle([this.lineStyle, textStyle]);

    this.vectorLayer?.getSource().addFeature(lineFeature);

    //箭头
    this.addMarker({
      coordinate: norPoint,
      symbolId: "icon-arrow",
      anchor: [0.51, 0.5],
    });
  }
2
3
4
5
6
7
8
9
10
11
12
13
14
15
16
17
18
19
20
21
22
23
24
25
26
27
28
29
30
31
32
33
34
35
36
37
38
39
- 选第二个点
继续选择第二个点,并将其保存在this.Points变量中.
const coordinates = geom.getCoordinates().slice(0, -1);

const pointscount = geom.getCoordinates();
if (pointscount.length >= 3) {
  let Angles = calculateAngle({ points: this.Points, azimuth: true });
  this.addMarker({
    coordinate: coordinates[1],
    symbolId: "icon-arrow",
    anchor: [0.51, 0.5],
    rotation: Angles.rotation,
  });

  this.Points[2] = coordinates[1];

  this.addAngleMark({
    coordinate: coordinates[0],
    Angles: Angles,
  });
  this.draw.finishDrawing();
}
2
3
4
5
6
7
8
9
10
11
12
13
14
15
16
17
18
19
20
如此,我们获取到了三个点的坐标,计算A 点处的夹角即为所求方位角,但是这里方位角的计算和角度的测量中计算夹角有所不同,因为方位角是有方向的,且其区间是[0°,360°],因此需要改造calculateAngle方法,如下:
// 如果叉积为负
let angle = crossProduct < 0 ? angleInDegrees - 180 : 180 - angleInDegrees;

//计算的夹角是方位角
if (azimuth) {
  angle = angle < 0 ? angle + 360 : angle;
}
2
3
4
5
6
7
最终效果如下:

# 总结
上述介绍了方位角的测量,主要是用到和角度测量的类似的实现,我们也可以通过turf.js计算方位角,后面会有一篇文章专门介绍turf.js.
turf.js计算方位角,需要先将坐标转换为EPSG:4326,再进行计算.
const startP = transform(this.Points[1], "EPSG:3857", "EPSG:4326");
const endP = transform(this.Points[2], "EPSG:3857", "EPSG:4326");
const azimuthInDegrees = turf.rhumbBearing(startP, endP);
console.log("Azimuth (in degrees):", azimuthInDegrees); //和calculateAngle方法返回的值一样
2
3
4
